Off The Grid Camping, Hiking & Backpacking, Hiking Gear, Shelter, Wilderness Survival
Light backpackers and hikers are often obsessive over their pack weight and frequently run into tough decisions when it comes to shelter. While building natural-material shelters like debris huts or lean-tos is a valuable skill, there are plenty of situations where suitable branches, leaves, or bark are scarce—think high alpine zones, deserts, or dense forests with young trees. In those cases, going without any shelter can turn dangerous fast, especially if bad weather rolls in unexpectedly. You need something quick, reliable, and packable to get out of the elements.
This is where a good tarp shines as an essential piece of gear.
When it comes to camping, hiking, and survival, a tarp is one of the most versatile tools you can carry. Tarps are lightweight, compact, durable, and incredibly adaptable. They can be configured into dozens of shelter designs to match rain, wind, sun, cold, or even insects (when paired with extras like netting). A quality camping tarp is often both lighter and cheaper than even the lightest ultralight tents, making it a favorite among thru-hikers, ultralight enthusiasts, and preppers.
In my experience, tarps offer advantages that make them far more appealing than tents for light hikers who prioritize minimal weight without sacrificing capability.
Why Tarp Shelters make a good shelter for camping, hiking, and survival
There are several reasons why we keep tarps as part of our gear collection:
Tarp shelters provide solid defense against rain, wind, sun, and even light snow or hail. They’re one of the most affordable ways to stay dry and comfortable in the backcountry. During heavy downpours, setting up a tent in pouring rain is a miserable, fumbling ordeal that soaks your gear and sleeping bag. Building a natural shelter can take hours and still leak. A good tarp, by contrast, can be deployed in under 60 seconds—tie a ridgeline between two trees or use trekking poles, stake the edges, and you’re protected. This speed is a lifesaver in sudden storms or when you’re exhausted. Tarps also excel at reflecting heat from a small fire placed in front, turning a cold night into something manageable with just a bit of reflected warmth.
Versatility Few pieces of gear match a tarp’s adaptability. With just paracord (or even shoelaces in a pinch) and some stakes or rocks, you can create setups for everything from open-air lounging to fully enclosed windproof shelters. Tarps work in forests with trees for ridgelines, open plains with trekking poles, or rocky areas using natural anchors. They’re great as ground cloths, rain catchers, gear covers, or even emergency signals. In survival mode, a tarp becomes a multi-tool: shelter, camouflage, water collection, or wind block. This flexibility makes it a smart backup when natural materials are unavailable or when you need to adapt to changing conditions fast.
Lightweight Tarps win hands-down on weight. An ultralight silnylon or Dyneema tarp (often 8-12 oz for a solo size) is dramatically lighter than most backpacking tents, even the featherweight models. This saved weight lets you carry more food, water, or other essentials without punishing your back. For long-distance hikers or those bugging out on foot, every ounce counts—tarps help keep your base weight low while still providing real shelter.
Cost-Effective Tarps are budget-friendly. You can get a solid, durable tarp for $20–$100, compared to $200–$600+ for a comparable lightweight tent. Many tarps double (or triple) as ground sheets, emergency blankets, or gear tarps, stretching your dollar further. Pair one with a cheap hammock for elevated sleeping, and you’ve got a complete system that’s far less expensive than fancy tent setups. In survival or off-grid scenarios, affordability means you can afford multiples—one for your pack, one for your vehicle, one stashed at home.
Disadvantages and When to Choose a Tent Instead
Tarps aren’t perfect. They offer less bug protection than tents (no built-in netting or floor), so mosquitoes, ticks, or spiders can be an issue in buggy areas—pairing with a bivy sack or net tent fixes this but adds weight. They require more skill to pitch effectively in wind or rain; a poorly set tarp can flap, sag, or leak. Condensation can build up more than in a double-wall tent, and they provide less privacy or “cocoon” feel for some people. In extreme storms with high winds and driving rain, a fully enclosed tent might hold up better. If bugs, ease of setup, or maximum weatherproofing are priorities, a tent could be the better primary shelter—but a tarp still makes an excellent lightweight backup or fair-weather option.
Tarp Shelters: A Quick History from Ancient Necessity to Modern Survival Essential
At OFFGRID Survival, we’re all about gear and skills that have proven themselves over time—stuff that actually works when the grid’s down, the weather turns ugly, and you’re miles from anywhere. Tarp shelters fit that challenge perfectly. They’re not some trendy; they’re just an evolution of what people have been doing for thousands of years to stay alive outdoors.
Way back in ancient times—think prehistory through early civilizations—people didn’t have access to fancy tents. They used whatever they had: animal hides, woven reeds, bark sheets, or crude cloth to throw over a frame or lean against a tree. These basic coverings blocked rain, wind, and sun while hunters, nomads, and early travelers moved through harsh environments. Simple? Yes. Effective? Absolutely. The core idea— a portable, waterproof sheet you can rig anywhere—hasn’t changed.
Fast forward to the 1400s–1600s and the real “tarp” story kicks off on the high seas. Sailors coated heavy canvas with pine tar (thus “tar-paulin”) to make it waterproof. These tarps covered cargo, protected hatches, and doubled as emergency shelters during storms or when they made landfall. Lightweight, tough, multi-purpose—exactly the kind of kit we still reach for today.
By the 19th and early 20th centuries, militaries worldwide adopted tarps hard. Soldiers used them to cover wagons, supplies, artillery, and as field shelters. During World War I and II, issue items included rubberized groundsheets that doubled as rain capes, shelter halves (two could button together into a pup tent), and full tarps for everything from lean-tos to improvised command posts. In the Pacific theater, Allied troops (especially Aussies) ran “hootchies”—tarps rigged as patrol-base overhead cover to beat the rain and sun. That same improvised mentality is alive and well in modern survival training.
Post-war, as civilian camping and backpacking exploded in the 1950s–1970s, heavy canvas army tents gave way to lighter options. Cheap plastic “blue tarps” became the budget choice for hunters, fishermen, and early ultralight hikers who wanted to ditch weight without losing protection. They were ugly, noisy, and heavy compared to today’s stuff, but they got the job done when natural debris wasn’t an option.
The real game-changer hit in the 1980s–2000s. Ultralight backpacking legend Ray Jardine pushed tarp systems hard in his PCT thru-hiker guides, proving you could go lighter and faster with a well-pitched tarp than most tents. That sparked a whole wave: GoLite, Mountain Laurel Designs, Zpacks, and others started cranking out silnylon and later Dyneema (DCF) tarps that weighed ounces instead of pounds. Suddenly, tarps weren’t just a backup—they were the primary shelter for serious long-distance hikers, thru-hikers, and minimalist preppers.
Today you see tarp shelters everywhere in the survival world: on bushcraft channels, in Alone contestant builds (long-term A-frames and enclosed setups), in military SERE training, and in every serious off-grid bug-out bag. Why? Because they deliver what matters most—lightweight, affordable, ridiculously versatile, and bombproof when you know how to pitch them right.
Choosing the Right Tarp for Light Hiking and Survival
Look for tarps in materials like silnylon (silicone-impregnated nylon—light, packable, waterproof) or Dyneema DCF (ultra-light, super-strong, but pricier). Avoid cheap blue poly tarps for primary use—they’re heavy and noisy. Size matters: 8×10 ft or 10×10 ft gives versatility for one person (with gear space), while larger works for two. Grommets every 2–3 ft along edges allow more pitch options. Hydrostatic head rating of 2,000mm+ ensures real waterproofing. Ultralight options weigh under 10 oz; survival-focused ones (thicker, insulated) add ounces but handle abuse better. Test setups in your backyard before hitting the trail.
Essential Gear for Tarp Shelters Beyond the tarp:
- Paracord or guyline (50–100 ft)—strong, lightweight for ridgelines and guylines.
- Stakes (6–12 titanium or aluminum)—for anchoring edges. Rocks work in a pinch.
- Trekking poles—perfect adjustable supports when trees are scarce.
- Groundsheet (polycro or Tyvek)—keeps moisture and dirt out.
- Optional: bug net/bivy for insects, extra cord for advanced pitches.
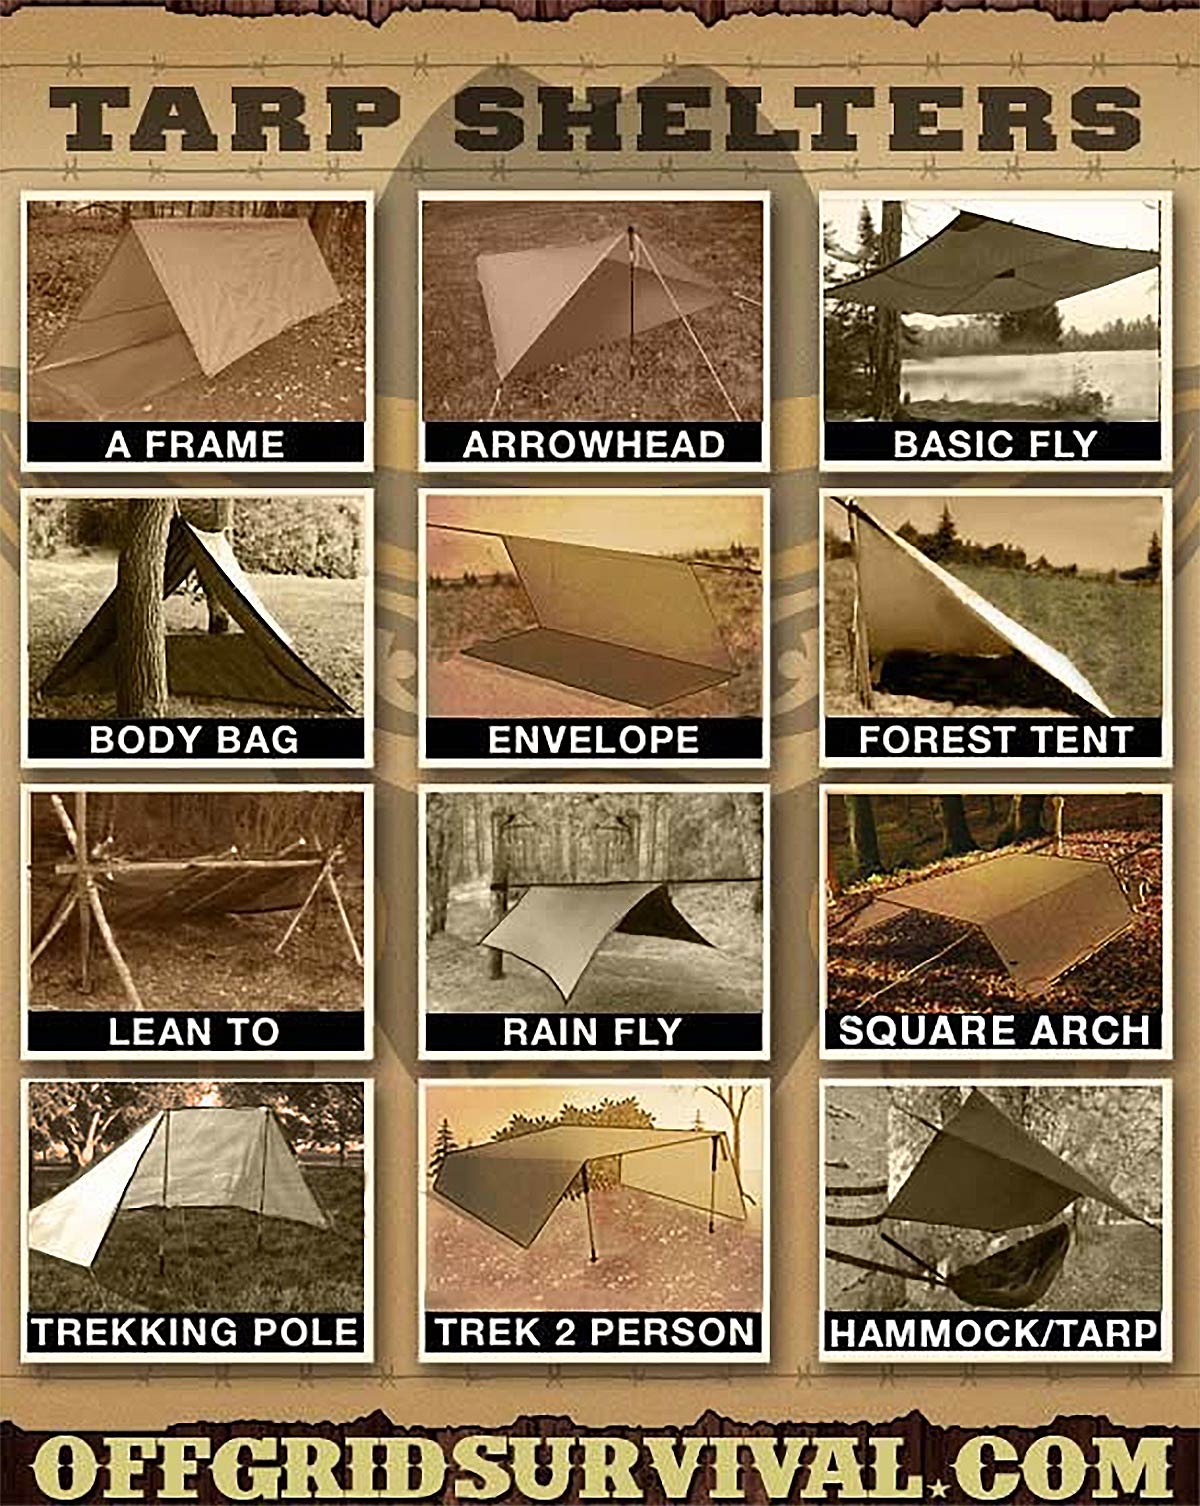
Types of Tarp Shelters
A-Frame Tarp Shelter
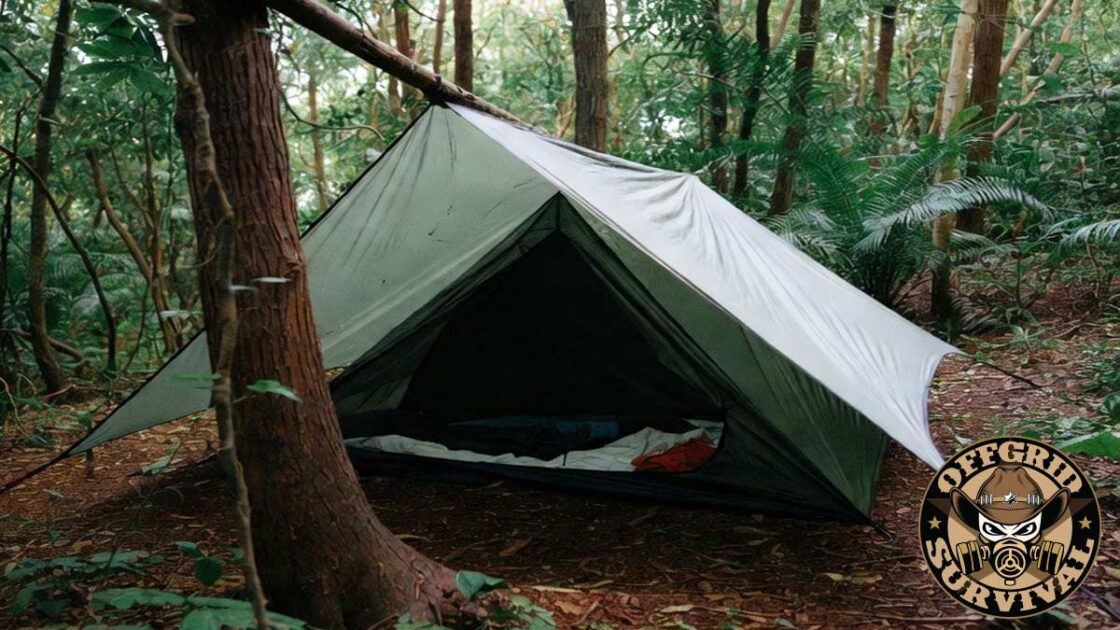
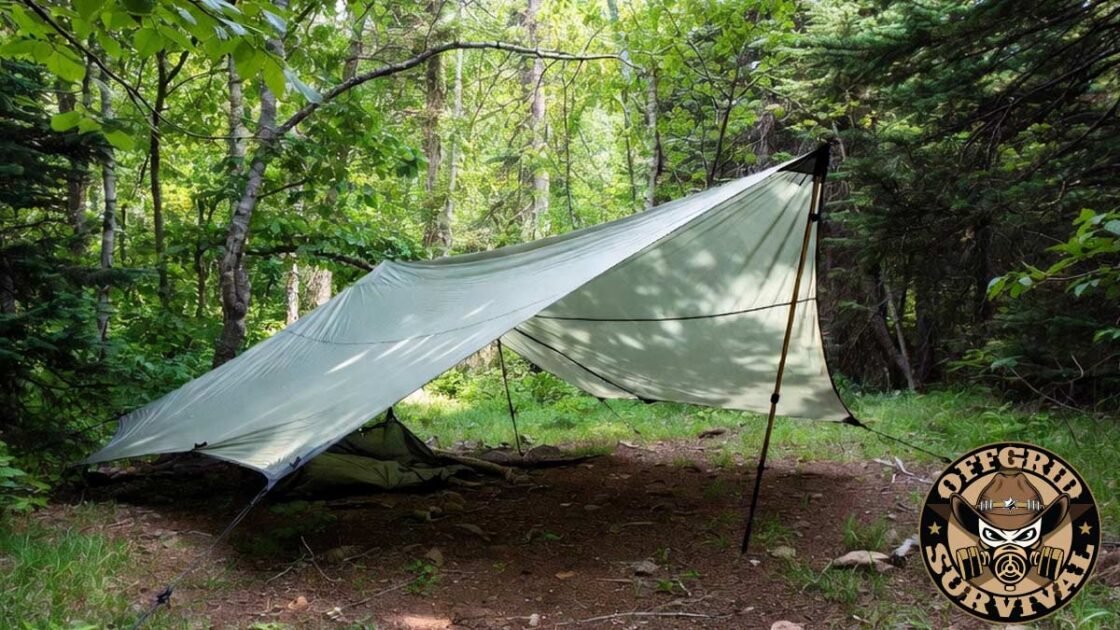
The classic go-to for balanced protection. String a ridgeline between two trees (or use poles), drape the tarp over it to form an “A” shape, then stake the sides down with rocks or stakes. This sheds rain and wind well, provides good headroom for sitting, and covers gear. For extra protection, close one end by pulling it taut or adding a back wall. Great for moderate weather; easy for beginners.
Lean-To Tarp Shelter Ideal for windy conditions or when wind comes from one direction. Tie one long edge high to a tree or pole, angle the tarp down to the ground, and stake the bottom edge. It creates a slanted roof that blocks wind and rain while leaving one side open for fire warmth. Add side walls by folding corners or using extra cord for better enclosure. Quick to set up and customizable—perfect for short stops or when you want an open front.
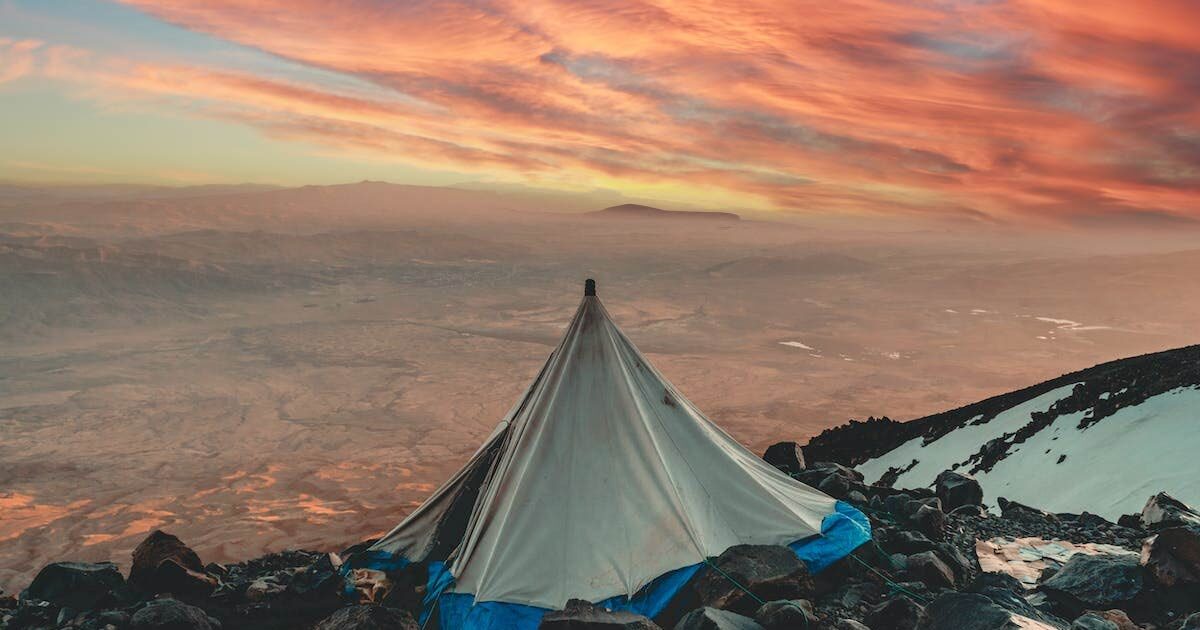
Teepee (or Tipi) Tarp Shelter Great all-around for variable weather. Gather corners to a central point (tie to a pole or hanging cord), stake the base edges out to form a cone. This provides 360-degree coverage with good headroom and wind resistance. Leave a door flap open for entry/fire. Excellent in open areas without trees; reflects heat well from a central fire.
Four-Point (or Flat) Tarp Shelter Super versatile for calm or sunny conditions. Tie each corner to trees or stakes to create a taut, flat canopy. This maximizes covered area for cooking, gear storage, or group use. Low-pitch it for rain shedding or high for ventilation. Works well as a “porch” extension over a hammock or tent.
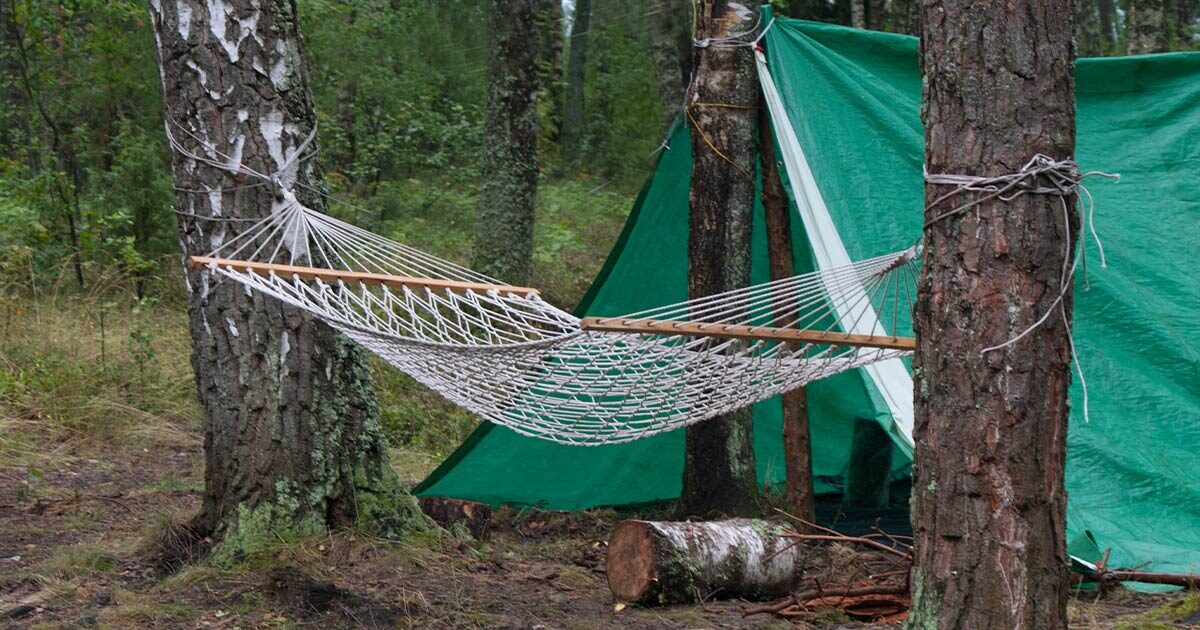
Hammock Tarp Shelter For hammock sleepers, attach the tarp above the hammock as a canopy (A-frame or asymmetric pitch works best). It shields from rain, wind, and sun while keeping you off the ground. Customize height for better airflow or lower for storm protection. A game-changer in buggy or wet areas where ground sleeping isn’t ideal.
With just paracord and a tarp, you can improvise countless shelters—many in under a minute—that keep you dry, warm (with a reflected fire), and protected. Experiment with variations like the C-Fly Wedge (for wind) or Closed-End A-Frame (for max rain block). In survival situations, tarps give you options when nature doesn’t cooperate.
With a small amount of paracord and a tarp, you can quickly set up an improvised shelter that will keep you dry and warm with a small reflected fire.
Tarp Shelter Configurations